
Easy Chicken Chop Recipe
A perfectly cooked chicken chop combines crispy exterior with juicy meat inside, creating a classic dish that never fails to satisfy. This recipe brings restaurant-quality results to your home kitchen.

 0 Comments


Why is this recipe so popular?
Balance between Crispness and Tenderness
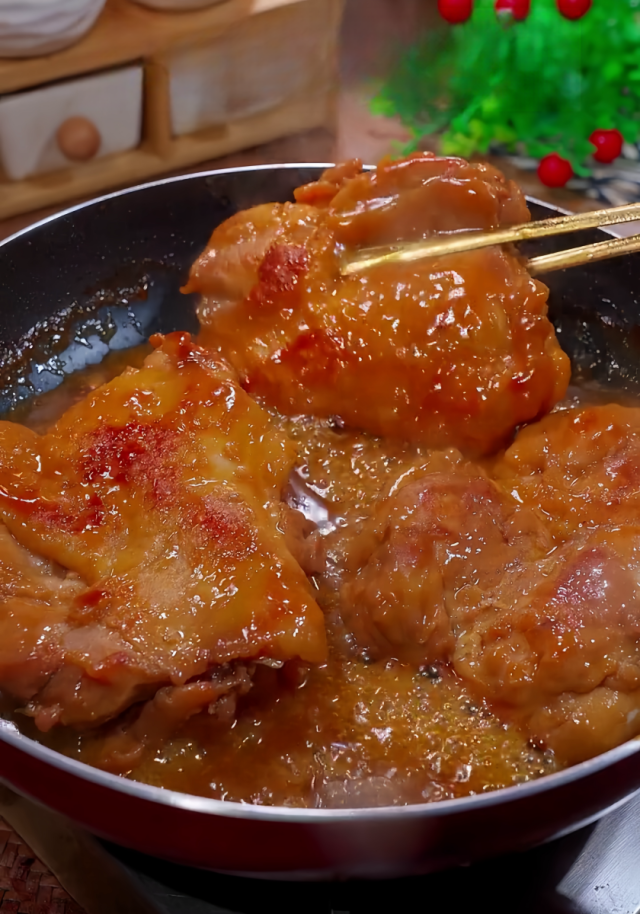
The chicken skin is fried to develop a caramelized, crispy crust, and then simmered to allow the meat to soak up the sauce and become tender. You can experience two different textures in one bite.
Friendly for Lazy People with Timers
Marinating for 20 minutes, frying for 3 + 3 minutes, and simmering for 15 minutes make it easy to keep track of time without any stress.
Sweet and Salty Flavors within the Comfort Zone
The sweetness of the honey is moderate, and the saltiness comes from light soy sauce rather than just pure salt, which is highly acceptable to people with Asian palates.
No Waste of Leftover Sauce
The sauce left on the plate can be used to mix with rice, dip steamed buns, or stir-fry green vegetables, eliminating the guilt of "tasty but troublesome."
Which part of the chicken should be used to make chicken chops?
These two parts are highly recommended:
Chicken thigh meat (the choice in this recipe)
After deboning the chicken thigh with the skin on, the meat is thick and rich in fat. After frying, the skin becomes crispy, and the inside is juicy and not tough. It is especially suitable when paired with sweet sauce.
Chicken breast meat (commonly used for traditional chicken chops)
If you are aiming for a low-fat option or prefer large, flat meat slices, you can choose chicken breast. But note: Cut it horizontally into slices about 1.5 cm thick. Before marinating, use the back of a knife to pound the meat several times to make it looser and prevent the meat from becoming dry and tough.
Small reminder
When using chicken thigh meat, pat dry the surface moisture with kitchen paper before frying to quickly develop a golden and crispy crust. If using chicken breast meat, reduce the simmering time to 10 minutes to prevent it from becoming overcooked.
Can this recipe be made in advance?
Sure, but it tastes best when freshly made. You can prepare the chicken and marinate it in advance according to the steps, then store it in the refrigerator. The frying and simmering steps can be completed one day or a few hours before serving.
If you make it in advance, it's best to store it in the refrigerator and reheat it before eating to maintain the tenderness of the chicken chop and the richness of the sauce.
INGREDIENTS
MAIN INGREDIENTS
- 4 chicken thighs (about 500g, pound with the back of a knife after deboning)
ACCESSORIES
- 10g scallions (cut into sections)
- 10g ginger (sliced)
- 15g garlic (sliced)
- 5ml cooking oil (for frying)
- Roasted white sesame seeds (for decoration)
SEASONINGS
- 2g salt
- 1g white pepper powder
- 20ml cooking wine (for marinating)
- 15ml light soy sauce (for the sauce)
- 7.5ml cooking wine (for the sauce)
- 15g honey
- 15g oyster sauce
- 100ml clear water
DIRECTIONS
STEP 1
After deboning the chicken thighs, flatten them. Lightly pound the meat with the back of a knife to make it loose, then put them into a bowl.
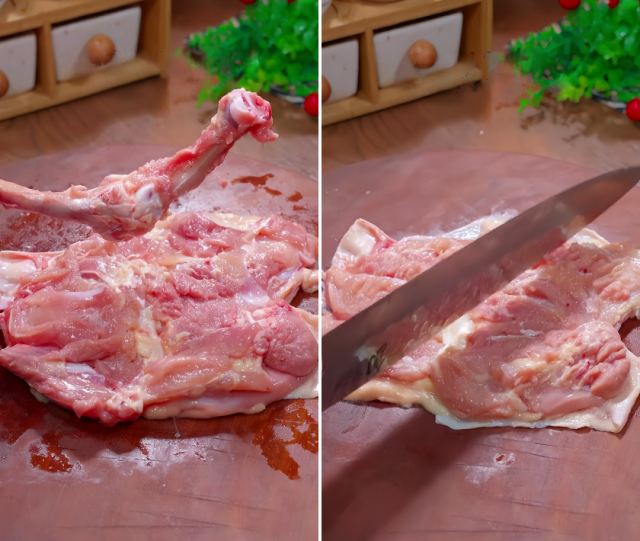
STEP 2
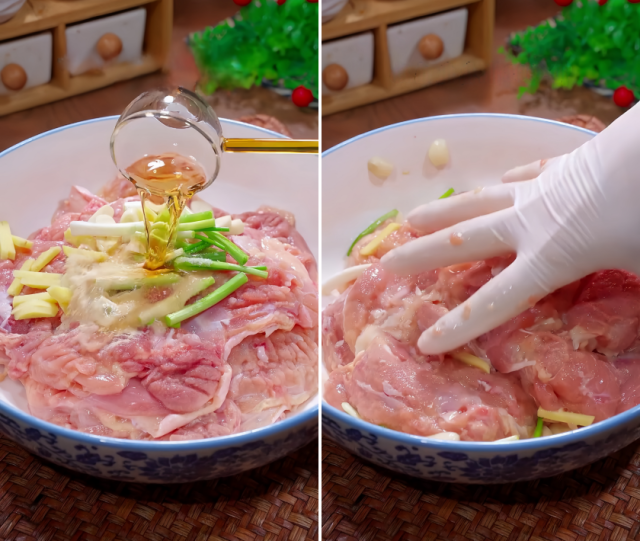
Then add scallion sections, ginger slices, garlic slices, 2g salt, 1g white pepper powder, and 20ml cooking wine. Mix well and marinate for 20 minutes.
STEP 3
Pour 5ml cooking oil into the pan. After heating it over medium heat, turn to medium-low heat. Put the chicken thighs skin-side down into the pan and fry until golden brown (about 3 minutes).

STEP 4
Flip the chicken thighs over and continue to fry the other side until golden brown, ensuring both sides are crispy and well-colored.

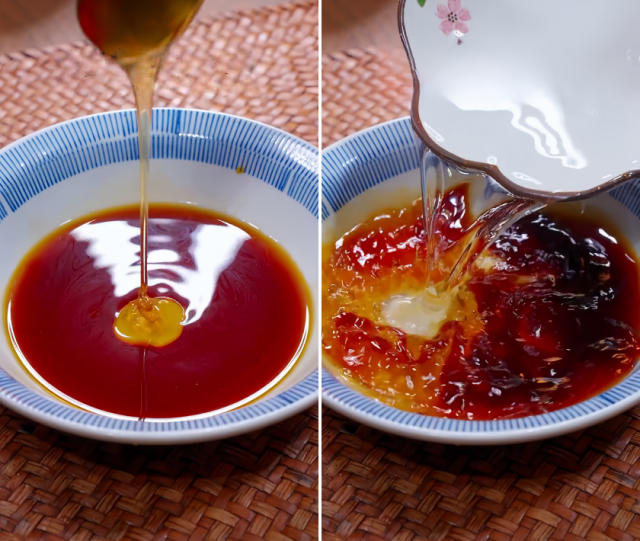
STEP 5
In an empty bowl, add 15ml light soy sauce, 7.5ml cooking wine, 15g honey, 15g oyster sauce, and 100ml clear water. Stir well and set aside.
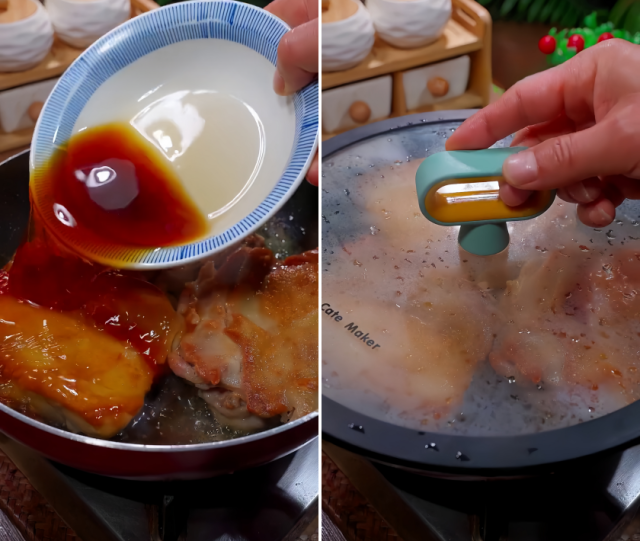
STEP 6
Pour the prepared sweet sauce into the pan, cover the pan, and simmer over low heat for 15 minutes.
STEP 7
Uncover the pan, turn to medium heat to reduce the sauce. During this time, turn the chicken thighs 2 - 3 times with a spatula to ensure the sauce is evenly coated on the meat.
STEP 8
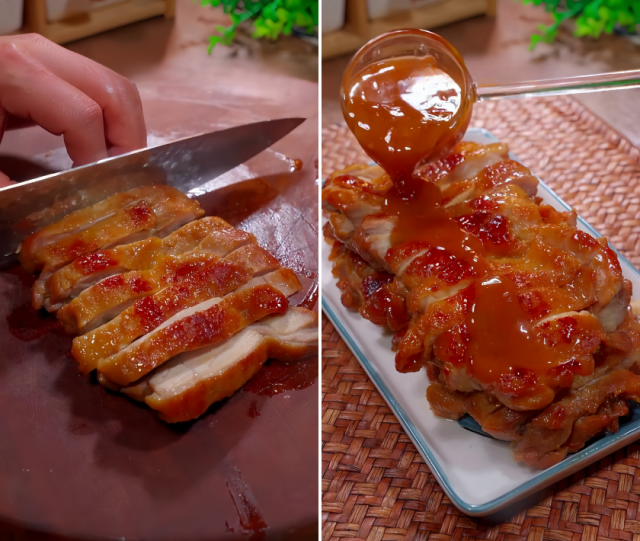
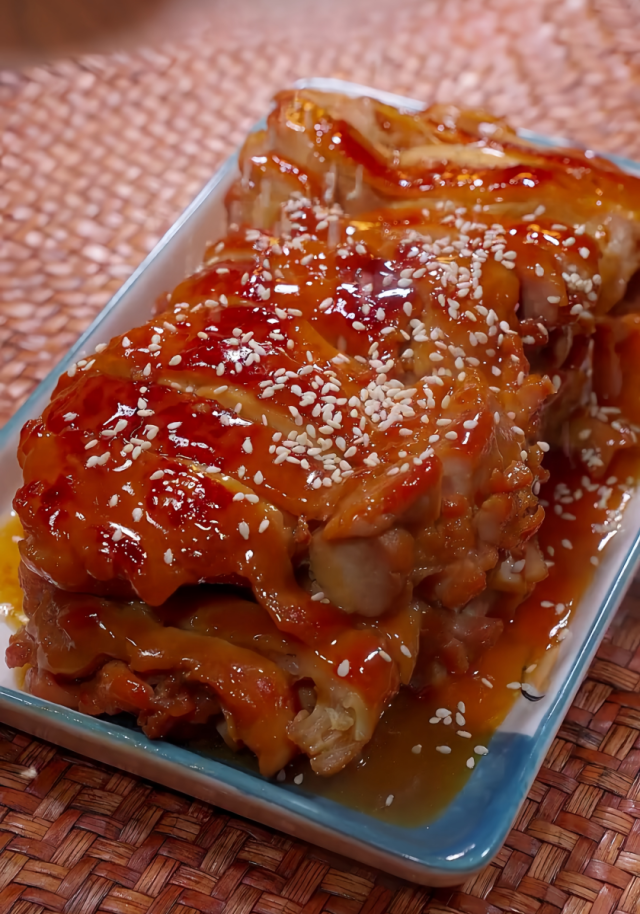
Cut the chicken thighs into pieces and transfer them to a plate. Drizzle the remaining sauce in the pan over the chicken.
STEP 9
Finally, sprinkle with roasted white sesame seeds.
More recipes worth trying
Garlic Butter Chicken Wings with Crispy Skin and Juicy Meat
Potato Cheese Pancake: Aromatic and Delightful
Mistakes to Avoid
Improper handling of chicken skin:
If you put the chicken directly into the pan without drying the moisture, the oil will splatter severely and also affect the crispness. Before frying, firmly press and soak up the surface moisture with kitchen paper. First, fry the chicken skin side over medium heat. After forcing out the fat, then flip it over.
Excessive heat:
Frying over high heat throughout the process can easily result in a burned exterior and an undercooked interior. Remember the tips: Start with medium heat when putting the chicken with skin into the pan to get a crispy skin. After flipping, turn to medium-low heat and fry slowly. When simmering, just keep the liquid in the pan bubbling gently.
Imbalanced sauce ratio:
Light soy sauce and oyster sauce already have a salty flavor, so be restrained when adding extra salt. Beginners are advised to prepare the sauce according to the recipe first. Taste the sauce for saltiness before reducing the sauce. If it's too salty, you can add a little hot water for adjustment.
Frequent uncovering during simmering:
Frequently lifting the lid to check will cause heat loss, making the meat tough. After covering the lid, set a 15 - minute alarm. Only turn the meat 1 - 2 times during this period to ensure even color.
Cutting while it's hot:
Cutting the chicken right after taking it out of the pan can easily cause the meat juice to drain. After turning off the heat, let the chicken chops sit in the pan for 3 minutes. Cut the chicken after the meat fibers relax, so that more juice can be locked in.
What dishes are suitable to pair with it?
Here are several simple and flavorful combinations recommended to pair with this honey chicken chop:
Lemon-Pickled Cucumber Slices
Thinly slice cucumbers and marinate them with a little salt, sugar, and lemon juice for 10 minutes. The sour and crispy taste can balance the richness of the sauce.
Blanched Okra
Blanch the okra in boiling water and then chill it in ice water. Dip it in a mixture of light soy sauce and mustard. The refreshing texture and fiber can aid digestion.
Garlic Butter Rice
Stir a small piece of butter and minced garlic into hot rice, then drizzle with the chicken chop sauce. It will disappear from the plate in no time.
Roasted Potato Wedges
Cut potatoes into wedges and roast until the exterior is crispy. Dip them in the honey sauce left on the plate. The combination of salty and sweet flavors is extremely satisfying.
Wakame and Tofu Soup
Boil tender tofu and soaked wakame in plain water and add a little salt. It is light but full of umami.
Corn Chowder
Cook canned corn with milk until tender, blend it in a blender, then return it to the pot to heat up and sprinkle with black pepper.
Creative Mix and Match
Don't waste the remaining honey sauce! Stir it into cooked udon noodles, add blanched spinach and a soft-boiled egg, and it will instantly turn into a Japanese-style noodle dish.
How to Store It?
Uncooked Marinated Chicken
Put it in a sealed bag or fresh-keeping box. It can be stored in the refrigerator for 2 days or frozen for 1 month. When using, there is no need to defrost. Just fry it directly (increase the frying time by 1 - 2 minutes).
Semi-finished Product (Fried but Not Simmered)
After frying until both sides are golden, let it cool down. Stack the pieces separated by parchment paper and store them in a sealed freezer for 2 weeks. Before simmering, there is no need to defrost. Just add the sauce and simmer, increasing the time by 3 minutes.
Fully Cooked Chicken Chop
Refrigeration: Cut it into pieces and store them separately from the sauce in a sealed box. Finish eating within 2 days.
Freezing: Wrap the chicken chop individually with aluminum foil, put it in a bag and freeze. Store the sauce in a small box and seal it for freezing. It can be stored for 1 week.
Reheating Tips
Refrigerated Chicken Chop: Cover the chicken chop with the sauce with plastic wrap and heat it on medium power in the microwave for 1 minute, or steam it for 5 minutes after the water in the steamer starts to boil.
Frozen Chicken Chop: Take it out and put it in the refrigerator to defrost overnight. Then reheat it over low heat in a pan, turn it over, pour the sauce and let it thicken.
Recipe analyzer
- Recipes: Easy Chicken Chop Recipe
- Main Ingredients:6
- Servings per recipe:1
- Servings size:814 g
-
Energy (calories):1740 kcal
-
Protein:128.85 g
-
Fat:128.4 g
Why gray?

-
Carbohydrates:9.4 g
-
Protein: 31%548 kcal
-
Fat: 66%1158 kcal
-
Carbohydrates: 2%36 kcal

The ratio shows whether the proportion of both fatty acids in your diet is optimal. Red color means too much of Omega 6 or too little of Omega 3. The data are rounded off and approximate.

0 REVIEWS